
Easy Crockpot Chicken Tacos (5 Ingredients, Dump and Go)
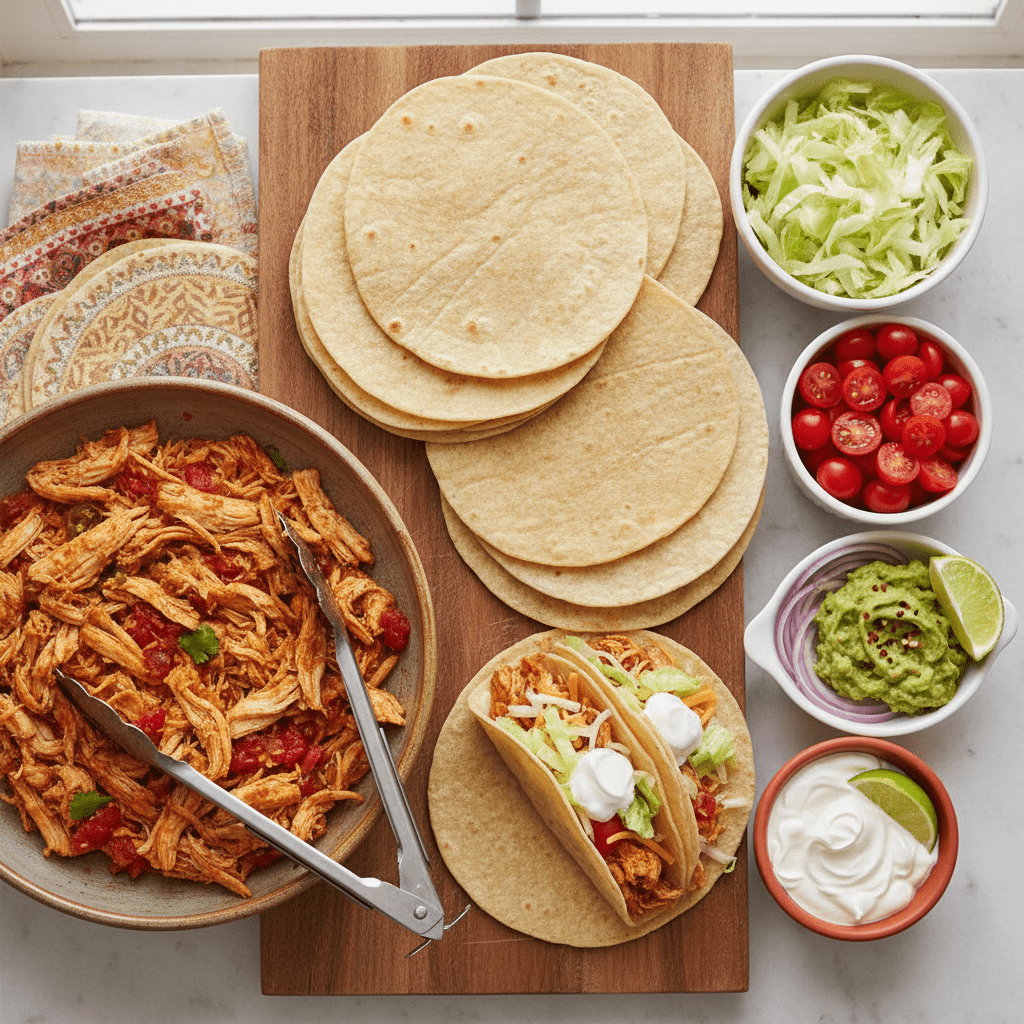
These easy crockpot chicken tacos are the weeknight dinner you’ve been looking for — five ingredients, two minutes of prep, and your slow cooker handles everything else while you go about your day. By dinnertime you’ve got juicy, boldly seasoned, pull-apart taco chicken that works in hard shells, soft tortillas, lettuce wraps, or bowls. It’s the kind of recipe that makes you look like you have it all together, even on the most chaotic days.
Why This Is the Easiest Crockpot Dinner Ever
There’s dump-and-go, and then there’s this. No chopping, no sautéing, no browning meat, no standing over the stove. You open a few things, place them in the crockpot, and walk away. That’s genuinely the entire process. For busy parents, working households, or anyone who just wants dinner handled before the day even starts, this recipe is a revelation.
What makes it work so well is the combination of salsa and taco seasoning doing all the heavy flavor lifting. The salsa adds acidity, moisture, and built-in aromatics — onion, garlic, tomato, pepper — while the taco seasoning brings the warmth, smokiness, and spice that makes chicken taste like it came from your favorite taqueria. Together, they create a braising liquid that transforms plain chicken breasts into something deeply flavorful and incredibly tender over hours of slow cooking.
This is also one of the most crowd-friendly, universally loved dinners you can make. Kids love it, adults love it, and because you can serve it so many different ways, it’s easy to make one batch work for everyone at the table. Let’s get into exactly what you need.
5 Ingredients You Need
Five ingredients. That’s the whole list. Each one is pulling serious weight so nothing is wasted.
- Chicken breasts, boneless skinless (2 lbs) — The protein base; they shred beautifully after slow cooking and absorb the surrounding flavors completely — no seasoning experience required
- Salsa (1 cup, your favorite jar) — Acts as both the braising liquid and the primary flavor base; use mild, medium, or hot depending on your heat preference — chunky salsa adds even more texture
- Taco seasoning (2 tbsp, store-bought or homemade) — Delivers the classic taco flavor profile in one convenient scoop; cumin, chili powder, garlic, and oregano all in one
- Chicken broth (¼ cup) — Ensures there’s enough liquid to keep the chicken moist throughout the full cook time and prevents the salsa from scorching on the bottom of the pot
- Lime juice (2 tbsp, fresh or bottled) — Added after shredding, not before; the bright acidity wakes up all the flavors and gives the finished chicken that fresh, vibrant quality that makes it taste restaurant-worthy
That’s it. Five ingredients that consistently deliver one of the most flavorful slow cooker meals in your entire recipe collection. Here’s how to put them together.
How to Make Crockpot Chicken Tacos
This might be the shortest instruction section you’ve ever read for a dinner recipe — and that’s entirely the point.
- Place the chicken breasts in the bottom of your slow cooker in a single layer. No need to trim or prep them beyond removing the packaging.
- Sprinkle the taco seasoning evenly over both sides of the chicken, making sure every piece gets a good coating.
- Pour the chicken broth over the seasoned chicken first, then spoon the salsa evenly over the top, making sure the chicken is well covered.
- Place the lid on the crockpot and cook on LOW for 6–8 hours or HIGH for 3–4 hours. LOW is always preferred for maximum tenderness — don’t lift the lid during cooking.
- Check for doneness by inserting a fork into the thickest breast — it should glide in with zero resistance and the internal temperature should read at least 165°F (74°C).
- Remove the chicken to a cutting board and shred using two forks, pulling in opposite directions. After 6–8 hours, it should fall apart almost on its own.
- Return the shredded chicken to the crockpot and stir it into the salsa cooking liquid. Let it sit on WARM for 10 minutes to absorb every drop of flavor.
- Squeeze the lime juice over the chicken and give it one final stir. Taste and adjust — more lime for brightness, a pinch of salt if needed, or a dash of hot sauce for extra heat.
- Serve immediately in your preferred taco style with your favorite toppings.
Tips for the Most Flavorful Taco Chicken
A five-ingredient recipe leaves little room for error, so these tips make sure you get maximum flavor every single time.
- Use a good quality salsa. Since salsa is the primary flavor base here, the quality of your jar matters more than usual. A chunky, well-seasoned salsa with visible vegetables will deliver far more flavor than a thin, watery one. Restaurant-style salsas sold in the refrigerated section are often excellent choices.
- Don’t skip the lime at the end. Fresh acid added after cooking — not before — is what makes the difference between taco chicken that tastes good and taco chicken that tastes genuinely vibrant and alive. The lime brightens everything and cuts through the richness of the slow-cooked meat.
- Add the broth even though it seems unnecessary. It might look like there’s already enough liquid from the salsa, but the broth provides insurance against the bottom of the pot scorching over 8 hours. It also keeps the chicken moist through the full cook time — don’t skip it.
- Cook on LOW whenever you can. The texture difference between chicken cooked on LOW for 7 hours versus HIGH for 3.5 hours is real and noticeable. Low heat breaks down the protein fibers more gently, resulting in chicken that’s silky and pull-apart tender rather than slightly stringy.
- Let the chicken sit in the juices after shredding. Those 10 minutes on WARM after returning the shredded meat to the pot are not optional — they’re where the magic happens. The chicken absorbs the concentrated salsa braising liquid and goes from “good” to “I need to make this every week.”
- Make your own taco seasoning for a lower-sodium version. Store-bought packets can be high in sodium. A simple mix of 1 tsp cumin, 1 tsp chili powder, ½ tsp garlic powder, ½ tsp smoked paprika, ¼ tsp oregano, and ¼ tsp black pepper gives you full control over the flavor and salt level.
Low-Carb Taco Serving Ideas
The taco chicken itself is completely low-carb — it’s all about what you put it in or on. Here are four ways to enjoy these crockpot chicken tacos without a single tortilla in sight.
- Lettuce Wrap Tacos: Use large, sturdy butter lettuce or romaine leaves as your shells. Load them with the chicken, shredded cheese, diced avocado, and a spoonful of sour cream. The cool, crisp lettuce against the warm, saucy chicken is genuinely one of the best low-carb swaps in existence — it doesn’t feel like a compromise at all.
- Taco Bowls: Serve the chicken over cauliflower rice with all your favorite toppings piled on — shredded cheddar, pico de gallo, guacamole, jalapeños, and a drizzle of lime crema. It’s filling, colorful, and completely satisfying without a single gram of tortilla carbs.
- Stuffed Avocado Tacos: Halve ripe avocados, remove the pits, and fill each half with a generous scoop of taco chicken topped with pico de gallo and cotija cheese. They look impressive, taste incredible, and are as low-carb as it gets.
- Taco Salad: Pile the warm chicken over shredded romaine, halved cherry tomatoes, black olives, shredded cheese, and crushed pork rinds for crunch. Dress with a simple lime vinaigrette or sour cream thinned with lime juice. It’s a full taco experience in salad form.
Topping Ideas
The right toppings take these crockpot chicken tacos from great to absolutely spectacular. Set up a little taco bar and let everyone customize their own.
- Shredded cheese — Sharp cheddar, Monterey Jack, or a Mexican blend; warm chicken melts it perfectly
- Fresh pico de gallo — Tomato, white onion, cilantro, jalapeño, and lime; adds freshness and brightness that balances the rich, savory chicken
- Sliced or smashed avocado — Creamy, cooling, and rich; a natural pairing with spiced taco chicken
- Sour cream or Mexican crema — Adds a cool, tangy creaminess that tempers any heat from the salsa or seasoning
- Pickled red onions — Bright, tangy, and slightly sweet; they cut through the richness of the chicken beautifully and add a pop of color
- Fresh cilantro — A classic taco topping that adds herbal freshness; skip if you’re in the cilantro-tastes-like-soap camp
- Sliced jalapeños — Fresh or pickled, for anyone who wants an extra hit of heat
- Hot sauce — A dash of your favorite brand right before eating ties everything together
How to Store, Freeze and Meal Prep
This taco chicken is one of the best meal prep recipes you can make — it stores perfectly and becomes the foundation of multiple different meals throughout the week.
Refrigerator: Store cooled chicken with its juices in an airtight container for up to 4 days. Always store with the cooking liquid — it keeps the chicken moist and flavorful rather than drying out in the fridge.
Freezer: Portion the cooled chicken and juices into freezer-safe zip-lock bags, laying flat for efficient storage. Freeze for up to 3 months. Label with the date and portion size.
Reheating from fridge: Reheat in a skillet over medium heat for 4–5 minutes, stirring occasionally. Add a small splash of chicken broth or water if the liquid has been fully absorbed. Microwave option: heat on high for 2 minutes, stirring once halfway through.
Reheating from frozen: Thaw overnight in the refrigerator and reheat as above. From fully frozen, place in a covered saucepan over low heat for 15–20 minutes, stirring occasionally. Microwave from frozen at 50% power for 5–6 minutes, stirring every 2 minutes.
Meal prep tip: Make a double batch on Sunday and use the chicken in tacos on Monday, taco bowls on Wednesday, and taco salads for lunch Thursday and Friday. One two-hour Sunday investment covers five meals — that’s one of the most efficient things you can do for your weeknight sanity.
Frequently Asked Questions
Can I use chicken thighs instead of chicken breasts?
Absolutely — and many people prefer them for this recipe. Boneless, skinless chicken thighs are slightly fattier than breasts, which means they stay more moist and juicy even if they cook a little longer than planned. They shred just as easily, produce a slightly richer flavor, and are very forgiving in the slow cooker. Use the exact same quantity and cook times as the recipe specifies.
Can I cook the chicken from frozen?
The USDA advises against cooking fully frozen chicken in a slow cooker due to the time it spends in the temperature danger zone. Partially thawed chicken is generally fine with the HIGH setting and added cook time — always verify it reaches an internal temperature of 165°F (74°C) before shredding. For best results, thaw chicken overnight in the fridge before adding it to the crockpot.
What’s the best salsa to use?
Any salsa you genuinely enjoy eating on its own will work well here. Chunky restaurant-style salsas add the most flavor and texture. Roasted tomato salsa, verde salsa, and even mango salsa all create deliciously different versions of this recipe. The one thing to avoid is a very thin, watery salsa — it won’t add much flavor and will make the cooking liquid too diluted.
My chicken is cooked but not shredding easily — what do I do?
If the chicken is fully cooked to temperature but still holding together firmly, it likely needs more time rather than less. Give it another 30–45 minutes on LOW with the lid on. True pull-apart tenderness comes when the internal fibers have fully relaxed — this usually happens between 6.5 and 7.5 hours on LOW for most chicken breasts. Thickness of the breast also matters, so thicker pieces may need closer to the 8-hour mark.
Can I make this in an Instant Pot?
Yes. Add all ingredients to the Instant Pot, seal the lid, and cook on HIGH PRESSURE for 15 minutes followed by a 10-minute natural pressure release. Shred the chicken, return it to the pot, add lime juice, and stir. The result is very close to the slow cooker version — slightly less deeply flavored but still excellent and ready in under 30 minutes, which makes it a fantastic option when you forgot to start the crockpot in the morning.
- Times
- Description
- Image
- Ingredients
- Method
- Notes
- Nutrition
- Prep time: 2 minutes
- Cook time: 6 hours
- Total time: 6 hours 1 minute
- Serves: 6
Ingredients
- 2 lbs boneless, skinless chicken breasts
- 1 cup salsa (your favorite jar — mild, medium, or hot)
- 2 tbsp taco seasoning
- ¼ cup low-sodium chicken broth
- 2 tbsp fresh lime juice (added after shredding)
- For serving: taco shells, tortillas, or lettuce wraps; toppings of choice
Method
- 1)
Place chicken breasts in the slow cooker in a single layer.
Sprinkle taco seasoning evenly over both sides of the chicken.
Pour chicken broth over the chicken, then spoon salsa evenly over the top.
Cover and cook on LOW for 6–8 hours or HIGH for 3–4 hours. Do not lift the lid.
Check that chicken reaches an internal temperature of 165°F (74°C).
Remove chicken to a cutting board and shred with two forks.
Return shredded chicken to the crockpot; stir into the cooking liquid.
Let sit on WARM for 10 minutes.
Squeeze lime juice over everything and stir. Taste and adjust seasoning.
Serve in tacos, bowls, or lettuce wraps with desired toppings.
Notes
LOW heat for 7–8 hours produces noticeably more tender, juicy chicken than HIGH heat — use LOW whenever your schedule allows.
Always add lime juice after cooking, not before — it keeps the brightness fresh rather than cooking it away.
Store leftovers with the cooking juices to keep the chicken moist in the fridge for up to 4 days.
Nutrition Estimate (per serving, chicken filling only, based on 6 servings)
| Nutrient | Amount |
|---|---|
| Calories | ~220 kcal |
| Protein | ~35g |
| Fat | ~4g |
| Carbohydrates | ~8g |
| Fiber | ~1g |
| Net Carbs | ~7g |
Nutrition is an estimate for the chicken filling only. Taco shells, tortillas, and toppings will add additional calories and carbohydrates.