
Easy Chicken Parmesan Recipe (Crispy, Juicy, Better Than a Restaurant)
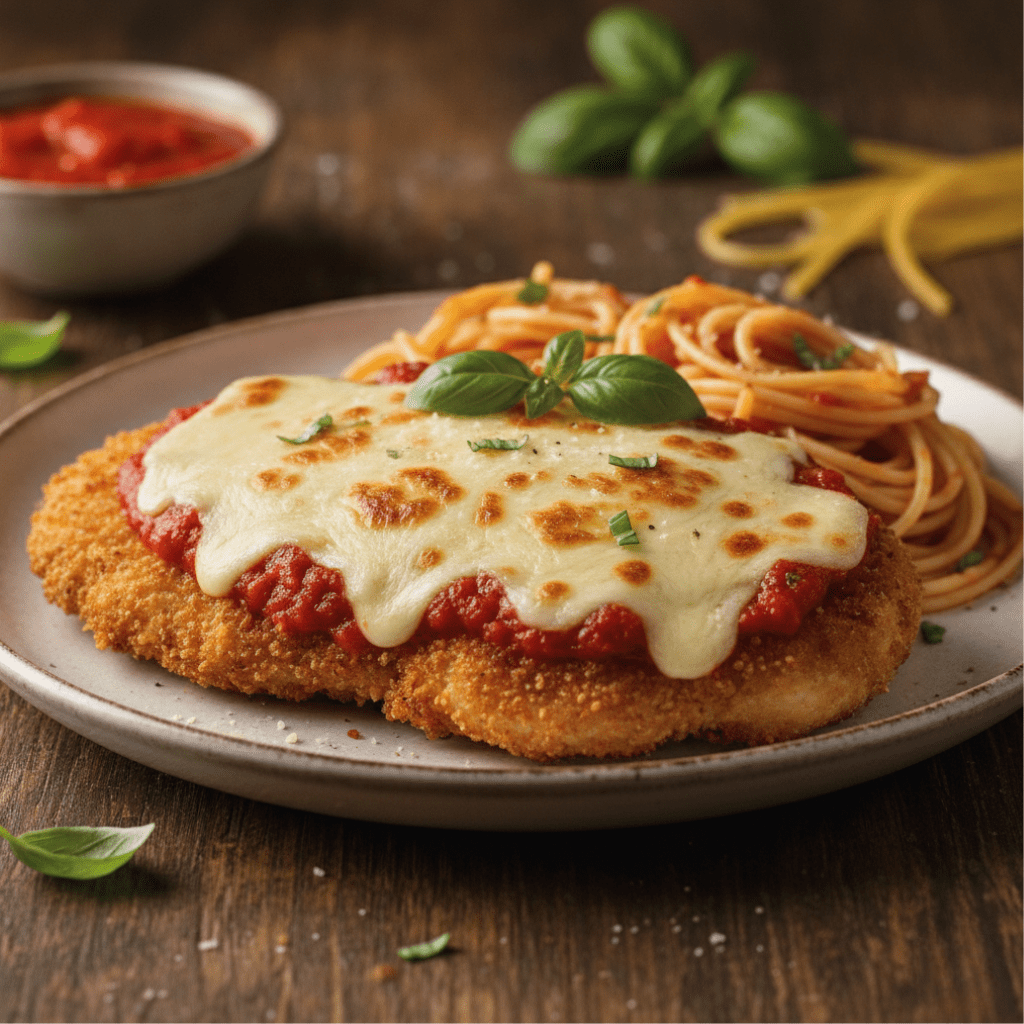
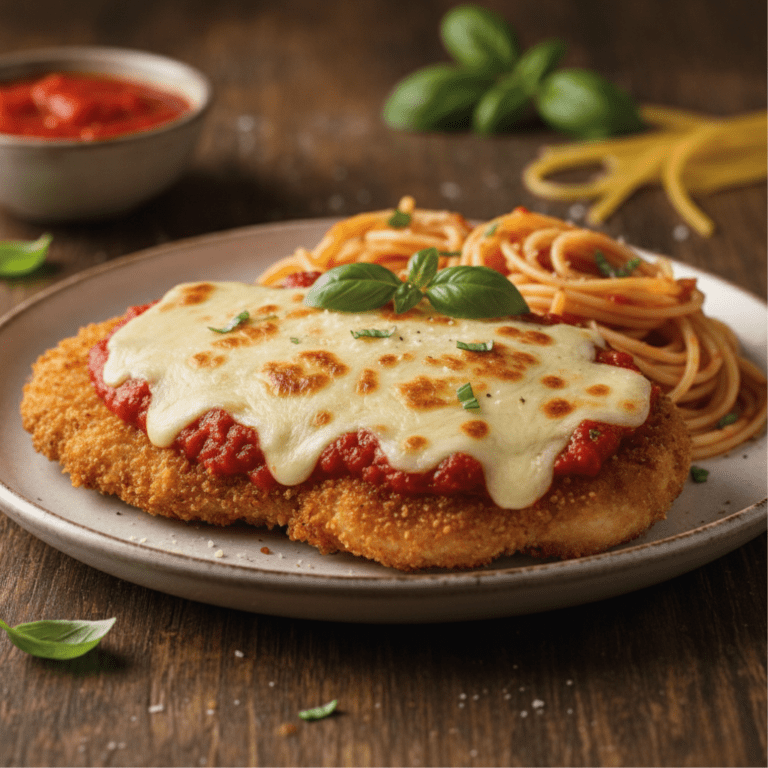
This easy chicken parmesan recipe is the Italian comfort food classic that never gets old — golden, shatteringly crispy breaded chicken topped with rich marinara sauce and a blanket of bubbling mozzarella, all ready in about 30 minutes from your own kitchen. It tastes like something you’d pay $25 for at a restaurant, and it’s honestly easier to make than most people think. Once you try it from scratch, you’ll never go back to the frozen version again.
Why This Chicken Parmesan Beats the Restaurant Version
Restaurant chicken parm is hit or miss — sometimes the crust is soggy under the sauce, the chicken is overcooked, or the cheese is barely melted. When you make it at home, you control every single variable. You choose the thickness of the chicken, how golden the crust gets, how much sauce goes on, and exactly how long the cheese bubbles under the broiler.
The method in this recipe uses a pan-fry-then-bake approach that is the absolute gold standard for chicken parm. Pan frying develops a genuinely crispy, golden crust that baking alone can never fully achieve. Then the oven finish lets the cheese melt perfectly and the chicken cook through without drying out. It’s the best of both techniques combined into one seamless, foolproof process.
The other secret weapon? Panko breadcrumbs mixed with grated Parmesan in the coating. Panko creates a lighter, crunchier crust than regular breadcrumbs, and the Parmesan adds a salty, savory depth that makes every bite taste more complex. Together they create a coating so good that the chicken almost doesn’t even need the sauce — almost.
Ingredients You Need
Every component of this dish matters. Here’s exactly what you need and why each one earns its place.
For the chicken:
- Boneless, skinless chicken breasts (2 large, about 1.5 lbs) — Sliced in half horizontally to make thinner cutlets that cook quickly and evenly; thinner chicken means a better crust-to-meat ratio in every bite
- All-purpose flour (½ cup) — The first layer of the three-step breading; it creates a dry surface for the egg to cling to, which anchors the breadcrumbs properly
- Eggs (2 large, beaten) — The binding layer that glues the breadcrumb coating to the chicken; don’t skip this step or the crust will fall off in the pan
- Panko breadcrumbs (1 cup) — Creates a dramatically crispier, lighter crust than standard breadcrumbs; the slightly coarser texture fries up golden and stays crunchier longer
- Italian breadcrumbs (½ cup) — Mixed with panko for seasoning and a finer texture that fills the gaps in the coating
- Parmesan cheese, grated (½ cup, divided) — Mixed into the breadcrumb coating for salty, nutty flavor that makes the crust genuinely irresistible
- Garlic powder (1 tsp) — Seasons the coating with savory depth; garlic and chicken are a combination that never fails
- Smoked paprika (½ tsp) — Adds a subtle warmth and helps the crust achieve that gorgeous deep golden color
- Salt and black pepper (1 tsp salt, ½ tsp pepper) — Season every layer — flour, egg, and breadcrumbs — for flavor throughout
- Olive oil or vegetable oil (3–4 tbsp) — For pan frying; use enough to come about ¼ inch up the side of the pan for proper crisping
For the topping:
- Marinara sauce (1½ cups, store-bought or homemade) — Use a quality jar you enjoy eating on its own; the sauce is the heart of the dish and a great one makes a significant difference
- Fresh mozzarella or shredded mozzarella (1½ cups) — Fresh mozzarella melts into silky, pillowy pools; shredded mozzarella gets stretchier and slightly browned — both are excellent
- Parmesan cheese, grated (¼ cup, for topping) — Sprinkled over the mozzarella before broiling for a golden, slightly salty top layer
- Fresh basil (for garnish) — Added after baking for color and a fresh, aromatic finish that brightens the whole dish
How to Make Chicken Parmesan Step by Step
Follow these steps carefully — especially the breading technique and the pan temperature — and you’ll get a perfectly crispy, juicy result every single time.
- Preheat your oven to 400°F (200°C). Line a baking sheet with a wire rack set on top — this allows air to circulate under the chicken and keeps the bottom crust from going soggy.
- Butterfly the chicken breasts by slicing each one in half horizontally to create two thinner cutlets. If they’re still uneven, place between two sheets of plastic wrap and pound gently with a meat mallet or rolling pin until about ½ inch thick.
- Set up your breading station with three shallow dishes: flour seasoned with salt and pepper in the first; beaten eggs in the second; panko, Italian breadcrumbs, ½ cup Parmesan, garlic powder, smoked paprika, salt, and pepper combined in the third.
- Bread the chicken by dredging each cutlet in flour first, shaking off the excess. Dip into the egg, letting any drips fall off. Then press firmly into the breadcrumb mixture, coating both sides completely. Press the breadcrumbs gently into the chicken so they adhere well.
- Heat oil in a large oven-safe skillet (cast iron is ideal) over medium-high heat. The oil should shimmer and look almost wavy before anything goes in — if it’s not hot enough, the crust will absorb oil instead of crisping.
- Pan fry the chicken cutlets for 3–4 minutes per side without moving them, until deep golden brown on both sides. Work in batches if needed — do not crowd the pan.
- Transfer the seared cutlets to the wire rack on your prepared baking sheet.
- Spoon marinara sauce generously over each cutlet, covering the surface but leaving a small border around the edges so the crust stays crispier.
- Top with mozzarella — either torn fresh mozzarella or a generous handful of shredded — followed by a sprinkle of the remaining Parmesan.
- Bake for 15–18 minutes until the cheese is fully melted and the chicken reads an internal temperature of 165°F (74°C).
- Optional: Broil for the last 2 minutes for a golden, bubbly, slightly charred cheese top. Watch it closely — broilers work fast.
- Garnish with fresh basil and serve immediately while the crust is still at its crispiest.
Tips for the Juiciest, Crispiest Chicken Parmesan
These are the tips that take your chicken parm from “good weeknight dinner” to “I need to make this for every guest I ever have.”
- Pound the chicken to even thickness. Uneven cutlets mean the thin end overcooks while the thick end is still underdone. A consistent ½-inch thickness ensures everything cooks in the same amount of time and stays juicy throughout.
- Bread immediately before frying, not hours ahead. If you bread the chicken and let it sit, the moisture from the chicken will make the coating soggy before it even hits the oil. Bread it right before the pan goes on.
- Make sure your oil is properly hot before the chicken goes in. Test it by dropping a few breadcrumbs in — if they sizzle immediately and vigorously, you’re ready. Cold oil leads to greasy, pale crust. Hot oil leads to golden, crispy perfection.
- Don’t sauce the whole cutlet. Leave about a ½-inch border of bare crust around the edge of each cutlet before adding sauce. This keeps the perimeter of the crust crispy even after baking, giving you that magical contrast of crunchy edge and saucy, cheesy center.
- Use a wire rack in the oven, not a flat baking sheet. A flat sheet traps steam under the chicken and softens the bottom crust. A wire rack lets hot air circulate all around the cutlet and keeps the bottom as crispy as the top.
- Rest for 2–3 minutes before serving. Just like steak, a brief rest lets the internal juices redistribute so the chicken stays moist when you cut into it.
Low-Carb Variations
Classic chicken parm uses a flour-and-breadcrumb coating that’s off-limits for low-carb and keto eaters — but the good news is that the low-carb versions are genuinely delicious in their own right.
- Almond Flour Chicken Parmesan: Replace the all-purpose flour and breadcrumbs entirely with a coating of almond flour mixed with grated Parmesan, garlic powder, and Italian seasoning. It doesn’t get quite as shatteringly crispy as panko, but it creates a beautiful golden crust with a rich, nutty flavor. Use a sugar-free marinara to keep carbs minimal.
- Pork Rind Chicken Parmesan: Crush plain or Italian-seasoned pork rinds into fine crumbs and use them as your breadcrumb substitute. This is the closest you’ll get to a traditional crunchy crust on a keto diet — the texture is remarkably similar to panko and fries up beautifully golden.
- Parmesan-Only Crust: Skip the breading entirely and coat the chicken directly in a thick layer of grated Parmesan. Pan fry it until the cheese forms a golden, caramelized crust directly on the chicken. It’s simpler, richer, and completely carb-free.
- Zucchini Noodle Chicken Parm Bowl: Make the full recipe (or use the almond flour version) and serve it sliced over spiralized zucchini noodles tossed in warm marinara instead of pasta. All the classic flavors of chicken parm, essentially zero extra carbs.
What to Serve With Chicken Parmesan
The right sides complete the meal and round out all that rich, saucy, cheesy goodness.
- Spaghetti or linguine with marinara — The absolute classic pairing; toss the pasta in warmed marinara and serve the chicken right on top for a full Italian-American dinner.
- Roasted garlic bread — Thick slices of crusty bread rubbed with garlic and olive oil, toasted until golden; perfect for scooping up any extra sauce left on the plate.
- Caesar salad — Crisp romaine, sharp Parmesan, and creamy dressing cut through the richness of the chicken and balance the meal beautifully.
- Roasted broccolini with lemon — A simple, slightly bitter green vegetable is a natural contrast to the rich, saucy chicken; roast at 425°F for 12 minutes and finish with a squeeze of lemon.
- Cauliflower rice with herbs — For a lighter, low-carb pairing that still feels substantial; season with olive oil, garlic, and fresh parsley for a side that complements the Italian flavors of the dish.
How to Store and Reheat
Leftover chicken parm is one of life’s genuine pleasures — with the right reheating method, the crust comes back beautifully.
Refrigerator: Store cooled chicken parmesan in an airtight container for up to 3 days. Store sauce and chicken together — the sauce keeps the chicken moist in the fridge.
Freezer: For best results, freeze the breaded and pan-fried chicken before adding sauce and cheese. Wrap individual cutlets tightly in plastic wrap and freeze for up to 1 month. When ready to eat, bake from frozen at 375°F (190°C) for 20–25 minutes, then add sauce and cheese and bake another 10 minutes. Fully assembled chicken parm can be frozen for up to 2 months but the crust will soften significantly.
Reheating from fridge: The oven is king here. Place chicken on a wire rack over a baking sheet and reheat at 375°F (190°C) for 12–15 minutes until heated through and the cheese is bubbly again. For a quick finish, broil for 1–2 minutes. Avoid the microwave — it steams the crust into mush and makes the chicken rubbery.
Reheating in an air fryer: This is actually the best reheating method if you have one. Air fry at 350°F (175°C) for 5–7 minutes and the crust crisps right back up beautifully, almost like it just came out of the pan.
Frequently Asked Questions
Why does my chicken parmesan crust always fall off?
This comes down to two things: skipping the flour layer and not pressing the breadcrumbs firmly into the chicken. The three-step breading process (flour → egg → breadcrumbs) exists for a reason — each layer bonds to the next. The flour creates a dry, rough surface for the egg to grip; the egg acts as glue for the breadcrumbs. Press the cutlet firmly into the breadcrumbs and then press again from the top. Also make sure your oil is hot enough before frying — if it’s too cool, the crust absorbs oil and starts to separate before it’s had a chance to set.
Can I bake this entirely instead of pan frying first?
You can, but the crust will be noticeably less crispy. If you want to go fully oven-baked, spray the breaded cutlets very generously with cooking spray on both sides and bake at 425°F (220°C) for 20 minutes before adding sauce and cheese. The high heat and oil spray together create reasonable browning without the stove step. It’s a lighter, easier version — just manage your expectations on crust texture.
What’s the best mozzarella to use?
Both fresh and shredded work well but deliver different results. Fresh mozzarella melts into gorgeous creamy pools with soft, pillowy texture — it’s more elegant and restaurant-style. Shredded low-moisture mozzarella gets stretchier, browns more, and holds up better if the chicken sits for a few minutes before serving. For the most beautiful presentation, use fresh. For the best melt and stretch, use shredded.
Can I make chicken parmesan ahead of time?
Yes — you can bread the chicken cutlets up to 8 hours ahead and store them uncovered on a wire rack in the fridge. The fridge air actually helps dry out the surface slightly, which leads to an even crispier crust when you fry them. Don’t sauce and cheese the chicken ahead of time — do that right before the final oven bake for the best results.
My chicken is golden on the outside but still pink inside — what do I do?
This is a very common issue and it usually means the cutlets are too thick or the oil was too hot, browning the exterior before the inside had time to cook. The fix: always pound the chicken to an even ½-inch thickness before breading, and use medium-high rather than high heat for frying. If the crust is perfectly golden but the chicken still needs time, transfer directly to the 400°F oven for 5–10 minutes before adding sauce and cheese — the oven heat will cook it through gently without burning the crust.
- Times
- Description
- Image
- Ingredients
- Method
- Notes
- Nutrition
- Prep time: 10 minutes
- Cook time: 20 minutes
- Total time: 30 minutes
- Serves: 4
Ingredients
Chicken & Breading:
- 2 large boneless skinless chicken breasts, halved horizontally (4 cutlets)
- ½ cup all-purpose flour, seasoned with salt and pepper
- 2 large eggs, beaten
- 1 cup panko breadcrumbs
- ½ cup Italian breadcrumbs
- ½ cup Parmesan cheese, grated (for coating)
- 1 tsp garlic powder
- ½ tsp smoked paprika
- 1 tsp kosher salt
- ½ tsp black pepper
- 3–4 tbsp olive oil (for frying)
Topping:
- 1½ cups marinara sauce
- 1½ cups mozzarella cheese (fresh or shredded)
- ¼ cup Parmesan cheese, grated
- Fresh basil, for garnish
Method
- 1)
Preheat oven to 400°F (200°C). Set a wire rack on a foil-lined baking sheet.
Pound chicken cutlets to an even ½-inch thickness.
Set up three-dish breading station: seasoned flour / beaten eggs / combined panko, Italian breadcrumbs, Parmesan, and spices.
Bread each cutlet: flour → egg → breadcrumb mixture, pressing firmly to adhere.
Heat olive oil in a large skillet over medium-high heat until shimmering.
Pan fry cutlets 3–4 minutes per side until deep golden brown. Work in batches.
Transfer to wire rack on baking sheet.
Spoon marinara over each cutlet, leaving a small border at the edges.
Top with mozzarella and a sprinkle of Parmesan.
Bake for 15–18 minutes until cheese is melted and chicken reaches 165°F (74°C).
Broil 2 minutes for golden, bubbly cheese. Garnish with fresh basil and serve immediately.
Notes
Always pound the chicken to even thickness — it’s the single most important step for juicy, evenly cooked cutlets.
Leave a small border of unsauced crust around each cutlet before baking — it keeps the edges crispy even after the oven.
Reheat leftovers in a 375°F oven or air fryer at 350°F — never the microwave — to bring the crust back to life.
Nutrition Estimate (per serving, based on 4 servings)
| Nutrient | Amount |
|---|---|
| Calories | ~520 kcal |
| Protein | ~46g |
| Fat | ~24g |
| Carbohydrates | ~28g |
| Fiber | ~2g |
| Net Carbs | ~26g |
Nutrition is an estimate and will vary based on the marinara sauce and cheese quantities used. Use almond flour and pork rind coatings with sugar-free marinara to reduce net carbs to approximately 4–6g per serving.